
Setting up a DTF printer is straightforward. By following the right steps, you can get started smoothly. This guide will cover all the necessary information, from unpacking the printer to creating your first design. These easy-to-follow directions will ensure you make the most of your new equipment. Let’s get started on your DTF printing adventure!
Table of Contents
- 1 Essential Equipment for DTF Printer Setup
- 2 Workspace Preparation for DTF Printer Setup
- 3 DTF Printer Setup Steps
- 4 Calibration and Maintenance for DTF Printer Setup
- 5 Tips for Effective DTF Printer Setup
- 6 Final thoughts
- 7 FAQ
- 7.1 What initial checks should I perform before setting up my DTF printer?
- 7.2 How do I properly install the DTF printer drivers on my computer?
- 7.3 What are the steps to load DTF film and ink into the printer?
- 7.4 How can I configure the print settings for optimal results?
- 7.5 What maintenance should I perform after setting up my DTF printer?
Essential Equipment for DTF Printer Setup
Selecting the Right DTF Printer
When selecting a DTF printer, considering features like print head quality and ink type is important. High-definition prints often depend on a good print head and the use of DTF inks for vibrant colors and durability. The intended application, such as garment printing on t-shirts or creating promotional items, can influence the choice, as specific printers may excel in different areas, such as flexibility for intricate designs or speed for larger production runs.
Budget constraints are a factoras well; more advanced printers generally come with a higher price tag. For those starting a DTF printing business, looking for a cost-effective model without sacrificing key features like proper film loading or reliable printer maintenance practices, including managing the capping station and reservoir levels, is advisable. Regular test printing is important, adjusting picture settings for optimal results.
Budget-conscious users should consider a reliable shaker dryer for curing prints effectively, allowing for positive inversion and adhesion while minimizing the risk of troubleshooting later.
Necessary Supplies for DTF Printing
For successful DTF printing, a selection of supplies is needed. This includes a DTF printer, DTF inks, DTF transfer films, and white ink to create high-definition prints. The right type of transfer film can vary; individuals should consider the texture and weight to ensure proper adhesion. Checking reviews and recommendations may help determine the best option for their needs.
Additional tools that enhance the DTF printing process include a heat press, a shaker dryer, and maintenance items likea rubber blade for ink distribution and a capping station for wet capping. Setting up the printer requires installing the software and adjusting picture settings. This may include tasks such as film loading with the right tension knobs, conducting test prints, and troubleshooting as necessary. Features like positive inversion and a white underbase may also improve output quality, particularly for garment printing.
Proper printer maintenance with a well-maintained reservoir supports durability in the final product.
Workspace Preparation for DTF Printer Setup
Choosing an Ideal Location
Factors include space for the printer, access to power, and a clean area for film printing. A suitable location should be large enough to accommodate equipment like the shaker dryer and heat press while allowing for movement during the printing process. The layout can influence efficiency; placing the DTF printer, capping station, and reservoir within easy reach can streamline operations like film loading and printer maintenance.
For instance, having tension knobs and rubber blades accessible means less downtime during troubleshooting. Local environmental conditions can affect printing, as humidity and temperature may influence ink distribution and adhesion on garments. A dry environment can enhance transfer film quality and durability, while high humidity might complicate the printing process, especially when working with sublimation on cotton.
To achieve high-definition prints, attention to the environment shapes the setup process, including how to print effectively with the DTF printer, ensuring that the correct picture settings are used to produce the best results.
Setting Up the Work Surface
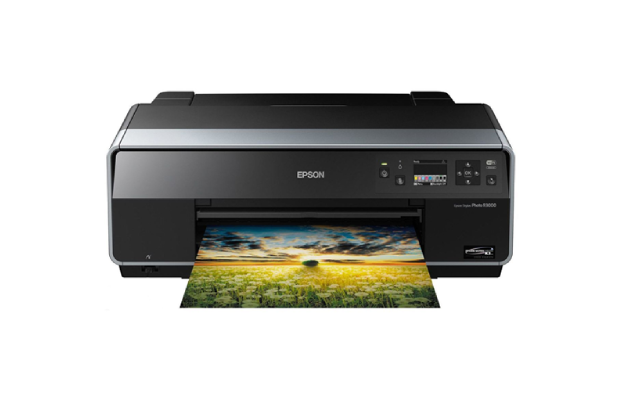
Selecting appropriate materials for the work surface in DTF printing involves understanding the types of printers used, such as the Epson L1800, along with the necessary materials for film printing, including DTF transfer films and inks. The layout should facilitate easy access to the printer, heat press, and shaker dryer, which is important for maintaining a smooth workflow.
Organizing tools like the rubber blade and tension knobs is important for efficient film loading, and establishing a designated area for printer maintenance, such as the capping station and reservoir, helps prevent ink issues. Keeping an orderly workspace allows for quick access to picture settings and effective troubleshooting. Safety precautions should ensure proper ventilation for handling DTF inks, create a clean area to mitigate slip hazards, and securely store materials such as white ink and transfer film away from children or unauthorized individuals.
By taking these factors into account, the setup can promote quick access during the printing process, improving the durability and quality of high-definition prints on garments like t-shirts.
DTF Printer Setup Steps
Unboxing and Initial Inspection
During the unboxing of the DTF printer, carefully check for any signs of damage, such as dents or scratches, both on the exterior and interior. Inspect the print head and reservoir areas for any issues that might affect performance. Ensure that all necessary components and accessories are included in the packaging by consulting the instruction manual, which should list items like DTF inks, transfer film, tension knobs, rubber blades, and the shaker dryer.
If anything is missing or damaged, document the discrepancies with photos and contact customer support for assistance. Addressing these issues can help avoid complications later in the DTF setup. Once everything is confirmed as intact, install the software and adjust the picture settings before performing a test print. This preparation will support a smooth start for DTF printing, ensuring high-definition prints and durability in garment printing processes.
For effective printer maintenance, regular checks of the capping station and the white underbase are necessary to maintain print quality.
Connecting Power and Data Cables
When connecting power cables, ensuring they are securely attached to the DTF printer is vital to prevent loose connections that can lead to electrical issues.
Additionally, checking for damaged cables can help ensure safe operation. Data cables should be connected firmly to enable effective communication between the DTF printer and the computer. Employing the correct port settings and properly aligning the connectors helps avoid problems during printing. If the DTF printer does not power on or fails to communicate after setup, the first step is to verify that the power source is functional and the cords are intact.
Next, double-check the data cable connections and inspect for any signs of wear or damage. Restarting both the printer and computer can be beneficial, ensuring that all software, especially for installation, is properly configured. Testing with a test print can confirm whether connection issues are resolved, facilitating smooth operations for tasks like film printing and achieving high-definition prints.
Installing DTF Printing Software
When installing DTF printing software on a computer, ensuring the system meets specific requirements, such as sufficient RAM and a compatible operating system, is important. Individuals can troubleshoot common installation issues by checking connections and confirming the printer, such as a DTF printer like the Epson L1800, is recognized by the computer.
After installation, configuring the DTF printing software includes setting picture options for high-definition prints and adjusting ink distribution for the white underbase. Proper film loading and adjusting the tension knobs for DTF transfer films are also necessary. Performing a test print is essential to check for correct adhesion and to ensure the print head functions well with white ink. Regular printer maintenance, such as checking the capping station and conducting a wet capping, will help prevent future issues.
Additionally, employing a shaker dryer can enhance durability during cold peel processes, further improving the quality of garments printed with DTF inks.
Calibration and Maintenance for DTF Printer Setup
Calibrating Print Heads
To properly calibrate the print heads of a DTF printer, start by installing the software that comes with the printer and adjusting all settings for film printing. Perform a test print to check quality, focusing on color accuracy, especially the white underbase, which affects adhesion on t-shirts. If the print shows uneven ink distribution or lacks high-definition prints, adjustments may be needed.
Adjust tension knobs and check the printer’s capping station for wet capping to maintain proper ink flow. Common calibration issues include misalignment, which can be fixed with a rubber blade for adjustments, and poor ink adhesion, which can be improved by ensuring the reservoir is filled with quality DTF inks. If problems persist, troubleshoot by inspecting film loading and testing the shaker dryer setup to ensure durability in the final print. Following these steps leads to successful DTF setup and effective garment printing.
Routine Maintenance Tasks
Regular upkeep for a DTF printer involves several routine tasks. Users should focus on checking the capping station for proper function, ensuring the reservoir is full of DTF inks, and inspecting the print head for clogs that affect ink distribution. Performing a test print can show if the white underbase is properly applied, which is important for high-definition prints on t-shirts.
During maintenance, film loading and adjustment of tension knobs are also necessary to ensure smooth film printing. Routine checks should happen weekly, with special attention to cleaning the rubber blade and performing wet capping to avoid drying ink. If the prints show poor adhesion or unusual lines, or if the printer makes strange noises, these are signs that troubleshooting is needed. The environment shapes printer performance too; maintaining a consistent temperature and humidity can enhance durability.
Installing the software correctly helps streamline the printing process, making it easier to manage tasks like positive inversion and using the shaker dryer effectively during the DTF setup.
Tips for Effective DTF Printer Setup
1. Ensure Proper Ventilation
To achieve proper ventilation when setting up a DTF printer, it’s important to open windows and use fans to increase airflow. Good air circulation helps remove fumes produced during film printing, especially with DTF inks and white ink. The placement of windows significantly influences air quality; keeping them open allows fresh air to enter, reducing harmful buildup from the printing process.
Ventilation systems, like exhaust fans, can also remove unwanted fumes, promoting a safe environment for users. Safety precautions include ensuring the workspace has adequate air exchange, using a shaker dryer to manage any chemical scents, and regularly checking the capping station and reservoir for proper ink distribution. These practices create an atmosphere that keeps DTF printing enjoyable while maintaining high-definition prints on t-shirts and other garments without exposure to harmful materials.
Adopting these strategies simplifies troubleshooting and enhances durability through better adhesion during the transfer film process.
2. Keep Supplies Organized
Organizing supplies for a DTF printer setup can enhance workflow significantly. Various strategies can be applied, like using clearly labeled bins and shelves to categorize items such as DTF inks, transfer films, and print heads.
For example, keeping all DTF transfer films in one area and white ink in another streamlines the printing process. This organization assists when troubleshooting issues, allowing for quick access to necessary supplies. Tools like drawer organizers or stackable containers can keep items such as tension knobs, rubber blades, and the shaker dryer neatly arranged. Properly storing DTF printers and related equipment, along with maintenance tools for print head cleaning and reservoir management, ensures that everything is easy to find. Keeping the area organized saves time during installations and test prints while contributing to the durability and quality of high-definition prints.
Moreover, an organized approach fosters a better environment for garment printing, improving efficiency for a DTF printing business while simplifying film loading and heat press applications.
3. Follow Manufacturer Guidelines
Reviewing manufacturer guidelines is important for the proper setup and operation of a DTF printer, including learning about film printing and adjusting picture settings for high-definition prints. Following these recommendations can enhance the printer’s performance and durability, helping the user achieve better adhesion and consistent ink distribution with DTF inks.
This can also minimize issues that might arise in the printing process, such as proper capping station maintenance and ensuringthe shaker dryer functions well. Common pitfalls include ignoring instructions for film loading and misadjusting tension knobs, which can lead to printing mistakes or potential damage to the print head. Users should also pay attention to guidelines regarding handling white ink and the correct setup for wet capping, as these details can greatly impact transfer film quality.
By knowing how to print with the right setup, such as using appropriate heat press settings and understanding cold peel versus hot peel, one can ensure successful garment printing, making the DTF printing process smoother and more effective.
Final thoughts
Setting up a Direct-to-Film (DTF) printer involves several steps to ensure optimal performance and quality output.
First, select a compatible printer model, as not all printers can support DTF printing. Specialized DTF printers are designed for this purpose and yield the best results.
Next, gather all necessary materials, which typically include DTF inks, films, a heat press, and transfer powder. Using high-quality supplies is important for achieving vibrant colors and durability.
Properly install DTF inks into the printer, ensuring that each color is correctly placed in its respective cartridge. This installation process may vary slightly depending on the printer model.
Once the printer is set up, load the DTF film carefully. Make sure it is positioned correctly to avoid printing errors. Adjust the printer settings for DTF printing, including resolution and color profiles.
After printing, apply a layer of transfer powder to the wet ink on the film, followed by heating it with a heat press. This step is important for curing the ink and preparing it for transfer onto garments.
Finally, follow the manufacturer’s guidelines for washing and handling printed items to maintain their quality over time. By adhering to these straightforward steps, users can successfully set up a DTF printer, leading to high-quality prints for various applications.
FAQ
What initial checks should I perform before setting up my DTF printer?
Before setting up your DTF printer, check the power supply for compatibility, ensure the printer is on a stable, level surface, verify that the ink cartridges are properly installed, and confirm that the software is installed and updated.
How do I properly install the DTF printer drivers on my computer?
To install DTF printer drivers, download the driver files from the manufacturer’s website. Run the setup file, follow the on-screen instructions, and connect your printer via USB or Wi-Fi when prompted. Restart your computer to complete the installation.
What are the steps to load DTF film and ink into the printer?
- Turn off the printer.
- Open the ink compartment.
- Insert DTF ink cartridges correctly.
- Load DTF film into the tray with the shiny side up.
- Close the compartments and power on the printer. Check for alignment and settings.
How can I configure the print settings for optimal results?
To configure optimal print settings, select high-quality paper for photos, use the ‘Best’ print quality in your printer settings, and adjust color management to ‘Adobe RGB’ for vibrant colors. Additionally, ensure proper paper type is selected, like ‘Glossy’ for photo prints, to enhance results.
What maintenance should I perform after setting up my DTF printer?
After setting up your DTF printer, routinely check and clean the print heads, maintain proper ink levels, and regularly flush the system to prevent clogs. Additionally, print test patterns weekly to ensure quality and calibrate settings as needed. Store materials in a cool, dry place.

Have you ever wanted to put your favorite designs on your clothes or other cool stuff? Well, a DTF printer Read more
Have you considered turning your regular printer into one that can print cool designs? It could print them on clothes Read more

Have you ever wondered if you could use your regular printer to do something cool like DTF printing? Well, let's Read more
If you're excited to try DTF printing and wondering what you need to get started, you've come to the right Read more